[Android + ELK] java.security.cert.CertPathValidatorException: Trust anchor for certification path
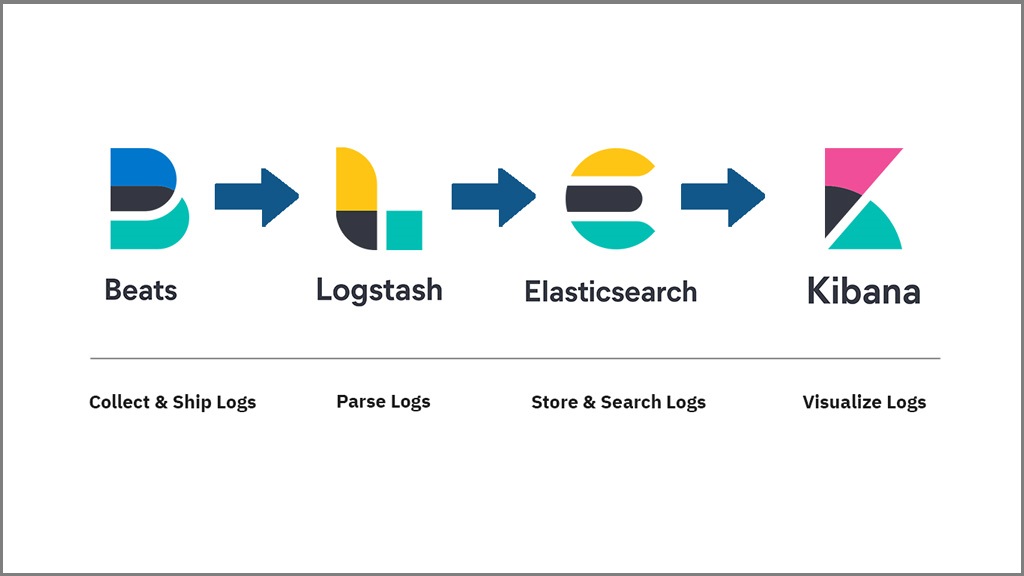
接觸 ELK 一段時間了,本篇的背景是想要利用 ELK 建立一個接收錯誤訊息的環境,因為有一些手機端發生的錯誤並沒有辦法被偵測到,所以想要利用現有資源來支援手機程式的開發。本篇分成幾個部分做一個紀錄,首先要先在一台 CentOS 的 server 上面建立 ElasticSearch 與 Kibana 的服務,然後必須要在這兩的服務上面啟動 TLS (SSL) ,接著在 Android 程式端在建置好 ElasticSearchLogger 就可以將錯誤訊息記錄到 ELK 裡面,這次卡比較久的地方是在 java.security.cert.CertPathValidatorException: Trust anchor for certification path 這個錯誤,所以本篇以此為標題。
安裝 ElasticSearch 7.10.2 + Kibana 7.10.2
下載並且解壓縮 ElasticSearch + Kibana
wget https://artifacts.elastic.co/downloads/elasticsearch/elasticsearch-7.10.2-linux-x86_64.tar.gz
tar -xzf elasticsearch-7.10.2-linux-x86_64.tar.gz
cd elasticsearch-7.10.2/

curl -O https://artifacts.elastic.co/downloads/kibana/kibana-7.12.0-linux-x86_64.tar.gz
tar -xzf kibana-7.10.2-linux-x86_64.tar.gz
cd kibana-7.10.2-linux-x86_64/
理論上要能夠利用以下的指令啟動:
cd elasticsearch-7.10.2
bin/elasticsearch

cd kibnana-7.10.2-linux-x86_64
bin/kibana
啟動的時候遇到以下的錯誤訊息:
ERROR: [3] bootstrap checks failed
[1]: max number of threads [999] for user [user] is too low, increase to at least [4096]
[2]: max file descriptors [4096] for elasticsearch process is too low, increase to at least [65535]
[3]: max virtual memory areas vm.max_map_count [65530] is too low, increase to at least [262144]
這是因為負責啟動 ElasticSearch 的 Linux 使用者在 Linux 系統上的權限不足,轉換到 root 權限輸入以下指令查詢:
[elasticsearch@vmi327567 bin]$ ulimit -a
core file size          (blocks, -c) 0
data seg size           (kbytes, -d) unlimited
scheduling priority             (-e) 0
file size               (blocks, -f) unlimited
pending signals                 (-i) 31202
max locked memory       (kbytes, -l) 262144
max memory size         (kbytes, -m) unlimited
open files                      (-n) 65536
pipe size            (512 bytes, -p) 8
POSIX message queues     (bytes, -q) 819200
real-time priority              (-r) 0
stack size              (kbytes, -s) 8192
cpu time               (seconds, -t) unlimited
max user processes              (-u) 4096
virtual memory          (kbytes, -v) unlimited
file locks (-x) unlimited參考解決方法是在 /etc/security/limits.conf 裡面增加以下的設定,但是使用 ulimit -u 則無法成功。
<domain>      <type>  <item>         <value>
* hard nproc 4096
* soft nproc 4096
* hard nofile 65536
* soft nofile 65536
關於 vm.max_map_count 的設定,我們則是使用以下指令解決:
sysctl -w vm.max_map_count=262144備註:預設啟動的位置,ElasticSearch 會在 9200 這個 port,Kibana 會在 port 5601。
安裝 SSL 到 ElasticSearch 與 Kibana 上
本節參考兩個系列的文章第一個系列是 Configuring SSL, TLS, and HTTPS to secure Elasticsearch, Kibana, Beats, and Logstash,另外一個系列是 ElasticSearch 官網的 Encrypting Communications in ElasticSearch 與他的中文翻譯,最後採用的是第一個方法,簡單來說它分成以下幾個步驟:
- 建立 instance.yml 關係檔案:
vim ~/tmp/cert_blog/instance.yml instances: - name: 'node1' dns: [ 'your-url' ] - name: 'my-kibana' dns: [ 'your-url' ] - 建立 certificate 並且解壓縮:
cd elasticsearch-7.10.2 bin/elasticsearch-certutil cert --keep-ca-key --pem --in ~/tmp/cert_blog/instance.yml --out ~/tmp/cert_blog/certs.zip cd ~/tmp/cert_blog unzip certs.zip -d ./certs cp ~/tmp/cert_blog/certs/ca/ca* ~/tmp/cert_blog/certs/node1/* certs - 更新 elasticsearch-7.10.2/config/elasticsearch.yml 檔案
// ======================== Elasticsearch Configuration ========================= // // NOTE: Elasticsearch comes with reasonable defaults for most settings. // Before you set out to tweak and tune the configuration, make sure you // understand what are you trying to accomplish and the consequences. // // The primary way of configuring a node is via this file. This template lists // the most important settings you may want to configure for a production cluster. // // Please consult the documentation for further information on configuration options: // https://www.elastic.co/guide/en/elasticsearch/reference/index.html // // ---------------------------------- Cluster ----------------------------------- // // Use a descriptive name for your cluster: // cluster.name: your-cluster-name // // ------------------------------------ Node ------------------------------------ // // Use a descriptive name for the node: // node.name: node-1 // // // Add custom attributes to the node: // node.attr.rack: r1 // // ----------------------------------- Paths ------------------------------------ // // Path to directory where to store the data (separate multiple locations by comma): // path.data: /path/to/data // // Path to log files: // path.logs: /path/to/logs // // ----------------------------------- Memory ----------------------------------- // // Lock the memory on startup: // bootstrap.memory_lock: false // // Make sure that the heap size is set to about half the memory available // on the system and that the owner of the process is allowed to use this // limit. // // Elasticsearch performs poorly when the system is swapping the memory. // // ---------------------------------- Network ----------------------------------- // // Set the bind address to a specific IP (IPv4 or IPv6): // network.host: url-you-filled-in-instance.yml // // Set a custom port for HTTP: // http.port: 9200 // // For more information, consult the network module documentation. // // --------------------------------- Discovery ---------------------------------- // // Pass an initial list of hosts to perform discovery when this node is started: // The default list of hosts is ["127.0.0.1", "[::1]"] // discovery.seed_hosts: ["url-you-filled-in-instance.yml"] //// // Bootstrap the cluster using an initial set of master-eligible nodes: // cluster.initial_master_nodes: ["node-1"] // // For more information, consult the discovery and cluster formation module documentation. // // ---------------------------------- Gateway ----------------------------------- // // Block initial recovery after a full cluster restart until N nodes are started: // gateway.recover_after_nodes: 1 // // For more information, consult the gateway module documentation. // // ---------------------------------- Various ----------------------------------- // // Require explicit names when deleting indices: // action.destructive_requires_name: true xpack.security.enabled: true xpack.security.http.ssl.enabled: true xpack.security.transport.ssl.enabled: true xpack.security.http.ssl.key: certs/node1.key xpack.security.http.ssl.certificate: certs/node1.crt xpack.security.http.ssl.certificate_authorities: certs/ca.crt xpack.security.http.ssl.verification_mode: certificate xpack.security.transport.ssl.key: certs/node1.key xpack.security.transport.ssl.certificate: certs/node1.crt xpack.security.transport.ssl.certificate_authorities: certs/ca.crt - 後續可以參考提供的網頁設定好 kibana 的 SSL。
創業 Client 往 ElasticSearch 推送 Event
關於推送 ElasticSearch 的 Event 可以參考檸檬爸之前整理過的常用 curl 指令,這邊我們是在 Android 上面實作的時候遇到以下的錯誤訊息:
sun.security.validator.ValidatorException: PKIX path building failed: sun.security.provider.certpath.SunCertPathBuilderException: unable to find valid certification path to requested target我們參考網頁實作以下的 HttpsTrustManager 並且在產生 HttpConnection 的之前呼叫,HttpsTrustManager.allowAllSSL(),
import java.security.KeyManagementException;
import java.security.NoSuchAlgorithmException;
import java.security.SecureRandom;
import java.security.cert.X509Certificate;

import javax.net.ssl.HostnameVerifier;
import javax.net.ssl.HttpsURLConnection;
import javax.net.ssl.SSLContext;
import javax.net.ssl.SSLSession;
import javax.net.ssl.TrustManager;
import javax.net.ssl.X509TrustManager;

public class HttpsTrustManager implements X509TrustManager {

    private static TrustManager[] trustManagers;
    private static final X509Certificate[] _AcceptedIssuers = new X509Certificate[]{};

    @Override
    public void checkClientTrusted(
            java.security.cert.X509Certificate[] x509Certificates, String s)
            throws java.security.cert.CertificateException {
    }

    @Override
    public void checkServerTrusted(
            java.security.cert.X509Certificate[] x509Certificates, String s)
            throws java.security.cert.CertificateException {
    }

    public boolean isClientTrusted(X509Certificate[] chain) {
        return true;
    }

    public boolean isServerTrusted(X509Certificate[] chain) {
        return true;
    }

    @Override
    public X509Certificate[] getAcceptedIssuers() {
        return _AcceptedIssuers;
    }

    public static void allowAllSSL() {
        HttpsURLConnection.setDefaultHostnameVerifier(new HostnameVerifier() {

            @Override
            public boolean verify(String arg0, SSLSession arg1) {
                return true;
            }

        });

        SSLContext context = null;
        if (trustManagers == null) {
            trustManagers = new TrustManager[]{new HttpsTrustManager()};
        }

        try {
            context = SSLContext.getInstance("TLS");
            context.init(null, trustManagers, new SecureRandom());
        } catch (NoSuchAlgorithmException e) {
            e.printStackTrace();
        } catch (KeyManagementException e) {
            e.printStackTrace();
        }

        HttpsURLConnection.setDefaultSSLSocketFactory(context.getSocketFactory());
    }
}
之後我們就可以正常得到成功發送的訊息:
{
  "_index": "test",
  "_type": "info",
  "_id": "d3CMd3gB3gpQ5aELYqQa",
  "_version": 1,
  "result": "created",
  "_shards": {
    "total": 2,
    "successful": 1,
    "failed": 0
  },
  "_seq_no": 1,
  "_primary_term": 4
}
